Saturday, October 31, 2009

Edible Arrangement Thanksgiving Center Piece

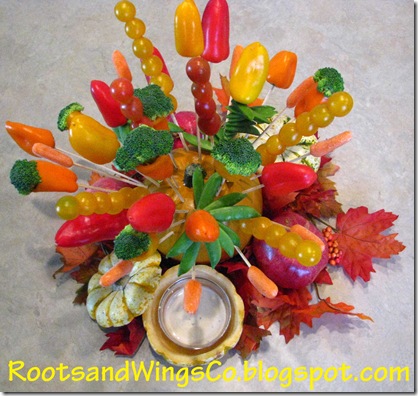
Thanksgiving edible arrangement center piece

This year I thought I would try a new twist on a Thanksgiving center piece. Usually the center piece sits in the middle of the table and looks lovely but it does not add anything to the feast. Inspired by a company called Edible Arrangements that does lovely bouquets of fruit, I decided on a Veggie arrangement.

Supplies:

-1 craft pumpkin ( you know the fake ones at the craft store)

-Bamboo skewers

-A couple of real mini ornamental pumpkins

-Some pomegranates generously given to you by your BFF

-A fall leaf garland

-Assorted vegetables in yellow, orange, red and green. I used mini bell peppers, carrots, broccoli, sugar snap peas, yellow cherry tomatoes and red grape tomatoes.

Use your imagination to put your vegetables on the skewers in creative ways. I suggest you use something metal like a nail or metal skewer to poke holes in your pumpkin where you want your vegetable sticks to go. I started with my sugar snap pea spirals because they were the biggest. When you start adding skewers to your pumpkin be sure to balance it out as you go. This will keep the pumpkin from tipping to one side. You can make some of the skewers a day in advance. I suggest waiting till the day of to put your tomatoes on the skewers. Put your skewers in the fridge till you are ready to set out your center piece.

I cut off the top of an ornamental pumpkin and cleaned out the inside. I have some small glass bowls that fit perfectly inside. For this picture (because Thanksgiving is still a month away) I only cut the top off of one of my mini pumpkins. Do this with several and put different dips inside as part of your center piece. It will also encourage your guests to actually eat from your arrangement.

Arrange the garland in a spiral under your pumpkin like a place mat. Arrange your ornamental pumpkins with dip around and place pomegranates between as filler.

Thanksgiving edible arrangement center piece 2

The day before Thanksgiving I plan to fill the mini pumpkin with water and place my small glass bowl inside and freeze it. This way when I put the dip in the bowl the ice around the bowl inside the pumpkin will keep it nice and chilled.

What I love about this is that the garland and the pumpkin are the only things I need to find a home for till next fall. I will be able to make more edible arrangements or simply place silk stems in the skewer holes for another kind of decoration.

Happy Thanksgiving!

Katrina

Thursday, October 29, 2009

Halloween Party


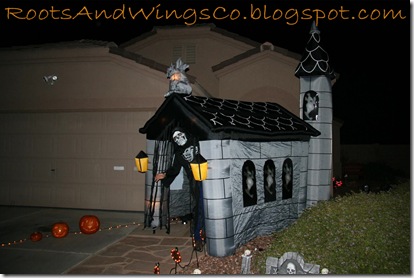
halloween party entrance

Welcome to our Halloween Party. First, set the tone by decorating your entrance. Can you tell that we enjoy Halloween? ;) Anjeanette has this banner and sign that she puts our for her entrances.halloween party dry ice bucket

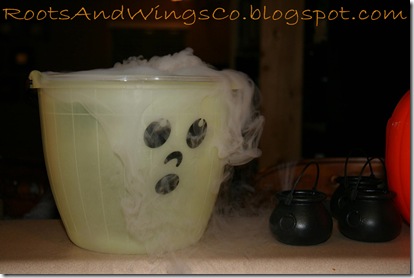
Next, decorate inside of your house. I love these dollar store buckets! Just nest a glass bowl inside the plastic bucket (as the dry ice will melt the plastic bucket). Add dry ice and water and you have the most fun decorations. Seriously, we can’t get enough dry ice throughout the house. For decorations don't forget to fill your crocheted pumpkins with candy corn! And if you made this table runner and banner, or this hand towel, make sure they are out!halloween party treat bucket

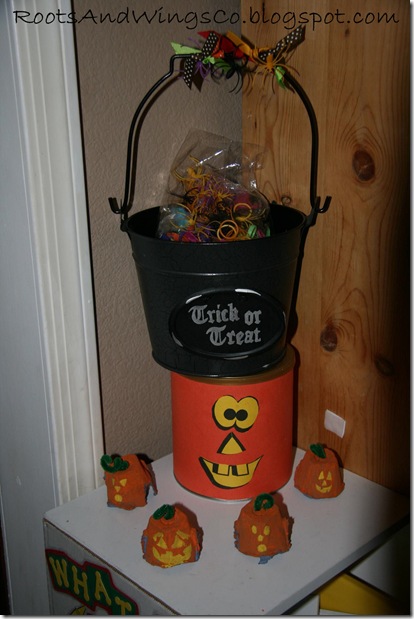
These are crafts that the kids made, and the top bucket was one of the cute buckets that Anjeanette gave us when she “Boo’d” us. I just filled that bucket with treats for the kids to go home with (spider rings and other Halloween trinkets, you could also include pencil toppers). halloween party meal in a pumpkin

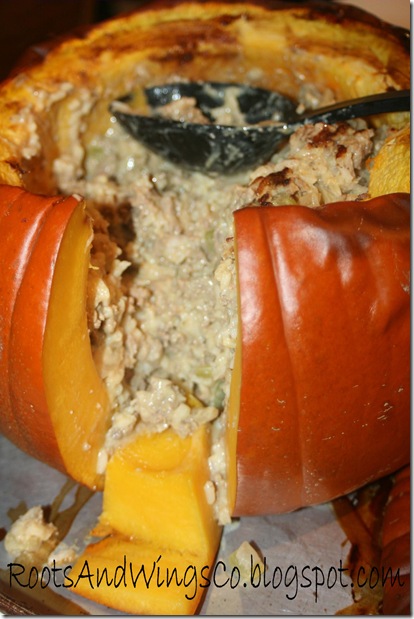
A MUST have for us is the meal in the pumpkin! Oh it’s sooooo yummy. Not only do you cook the meal in the pumpkin, you then take chunks of the pumpkin with your serving. Delish! I think this is my favorite tradition of Halloween. Other Halloween foods are dry ice root beer, skeleton cookies, candy corn rice krispies, pumpkin cookies, white chocolate ghost suckers, apple pie spice drink, oreo cookie spiders, popcorn fingers, edible gross body parts, etc!

On to the games. This is my favorite. Dangling Donuts. Because who doesn’t need more food (especially highly sugared food) after our Halloween meal!?halloween party dangling donuts 2
All you do is get donuts (we get a variety). Tie a long piece of string onto each donut. Grab a dowel or long sturdy stick. Decide who is going to go against each other (don’t go against Anjeanette…she is the QUEEN of this game…that’s all I’m saying). Each person picks their own donut. Tie donuts on the dowel and go at it (without using your hands!). For our little kids we’ve let 3 go at a time, but otherwise we stick to 2 at a time. This is also best played outside as it leaves a mess below.
halloween pin the hat on the witch game
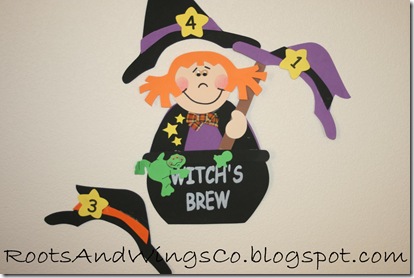
Another really fun game is this Pin The Hat On The Witch Game I made one year. I love variations of Pin The Tail On The Donkey. Don’t forget the other games like bobbing for apples (no pictures because I don’t want to show our kids)!
halloween morning table setting
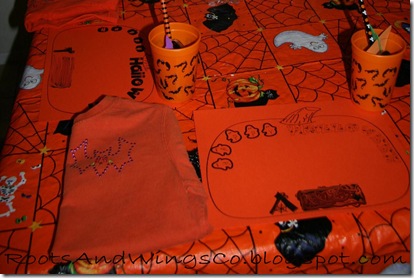
You could do this as place settings for the party (though this was what I had for my kids on the first day of October). I just printed out a pumpkin on orange paper and wrote out Happy Halloween _______ using my awesome Halloween fonts. That was for their placemat. Then they got Halloween cups to use all month, that were filled with Halloween pencils and toys. I also give them their Halloween shirt for the year, on the first day so that they can wear it the whole month long. These were shirts that I added beaded Halloween designs to.

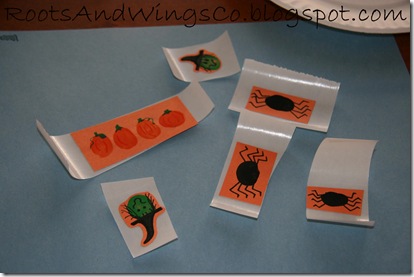
The Gals here at Roots And Wings Co just love holidays and Halloween is right there at the top of the list. We have Halloween parties every year. We just had ours last weekend (thank you Anjeanette for hosting an awesome night). I am holding another one for the kids on Friday. So many things to do. I love doing the same things year after year, and I also love adding new things every year. Some things for the kiddos party will be tossing bean bags into my large cauldron and crafts. We always make Haunted Houses at this party (like gingerbread houses for Christmas except we use chocolate frosting to make it spookier, and you construct your house funny so it's a crooked haunted house). For crafts we will be making fingerprints in orange, green, and black. Then, we draw parts on them that turn them into witches, pumpkins, and monsters. I turn these into stickers and then the kids make Halloween cards for family using their fingerprint stickers. halloween fingerprint shapes
Hope you enjoyed the party. For those of you that are still hosting a Halloween party this week (or for your fun Halloween night dinner) I hope this gives you some fun ideas to try.

Rebecca

Tuesday, October 27, 2009

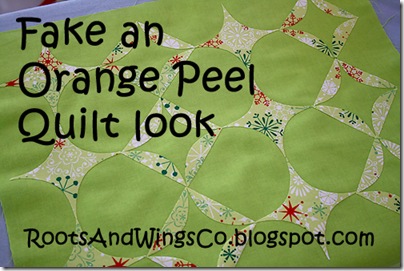
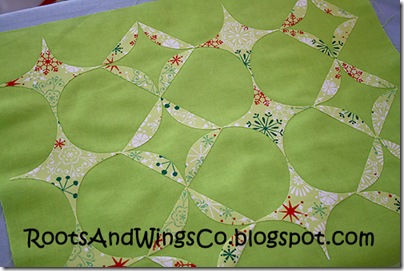
Using appliqué to fake the look of Orange Peel or Cathedral Windows

finished orange peel

I have been totally obsessed with the look of Folded quilts like Cathedral Window, fabric origami and Orange Peel quilts lately. I have seen lots of wonderful tutorials for the different techniques. But I am always trying to figure out things my way. When I see something, I get crazy obsessed with figuring it out in my head. It is a challenge to me to think of ways I could do it my way. I think I even made mention to my obsession with it in one of my posts not too long ago.

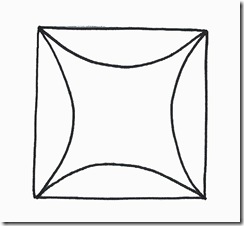
I started with this basic Cathedral Window pattern. You can make it any size you want, but mine were 3” squares for this project.

orange peel template

I took some awesome Michael Miller Funky Christmas fabric and ironed on some fusible webbing to the back of it. Then I cut that fabric into 3 inch squares. On each square, I traced the template and cut out the shape. I was careful not to mess up either the center shape or the curved outside shapes because they are both used.

I ironed down one of the center shapes first. Actually *press* would be a better way to say it. You really want to be careful not moving the iron around when you are pressing appliqué on.

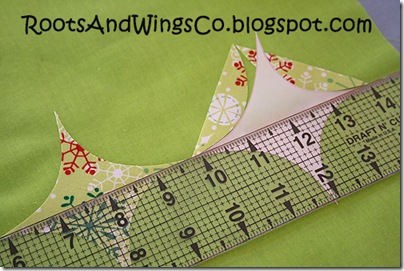
After the first center shape was pressed into place, I carefully arranged the outside curved shapes. I used the backing from the center shape to line up the outside shapes. I also used a ruler to make sure the whole thing remains lined up nicely. Press the outside shapes into place. I also made sure that the outside shapes were in the correct place as far as the printed pattern goes. You want it to look as though it is a real Cathedral Window, or Orange Peel with fabric folded.

1 use a ruler to line up your appliques

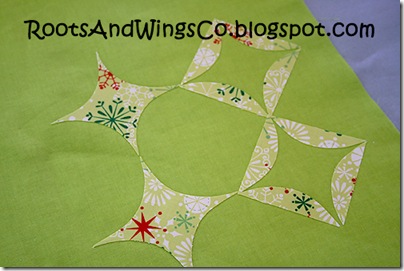
Then you just work your way out. Line up a row of the inside shapes and another line of the outside shapes.

2 add rows

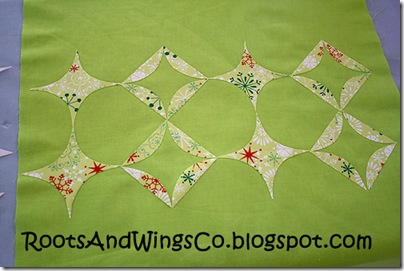
And some more…

3 more rows

Until you have enough to make something out of it.

Orange Peel

Yes, it is still time consuming. But I just thought it would be a fun way to do it.

I would love to see if you make something using this. I have so many ideas floating around in my head about what I'm going to make with this.

Anjeanette

~~~

Katrina here,

Anjeanette,

I have to say that I love this for many reasons. First of all you took that great designer fabric and paired it with the perfect solid fabric. Seriously people, she has great taste in fabrics. Second because you used the solid fabric as the background you were able to take your fat quarter of the designer fabric and create a pattern that covers 1/2 a yard of the solid and still have some designer fabric left over! What a great way to stretch your almighty dollar! I bow down to you! You have taken something that I would have looked at and loved but never would have attempted to make it myself. You have made this complex pattern (that isn't for beginners) and made it easy for beginners. I mean really, if you want a big quilt made with this pattern then all you have to do is start with the right size background fabric and iron on your pattern. Sandwich the whole thing like you do with a regular patch work quilt and then sew over your pattern to quilt it. Hmmmmm.

I can't wait till you post your finished items!! Hint Hint!! The suspense is killing me!!

XOXOXO

Saturday, October 24, 2009

Hot Spiced Orange Drink

hot spiced orange drink Mmmmm, yes that’s me, sitting back enjoying a hot drink and thinking about all I have to be thankful for. Seriously, even through my hectic, chaotic life, I’m loving every minute. You will probably hear me go on and on during this time of year. But I have the greatest family on Earth (I swear, even the extended family members are so super awesome and amazing!), wonderful friends, and a new cute little house. What more could I ask for?

At this time of year there are so many things that I am thankful for. One thing I try to never forget about during the seasons is the smell and taste of the season. See this post of mine for more smells of the seasons. Because my Mom used to make the same things at the Holidays, certain smells or tastes will always remind me of that Holiday! I hope to pass these kind of memory invoking things on to my children. We make this drink, and another one called Wassail, during Autumn and Winter.

This drink is from a mix that you make and then just pull it out all Autumn and Winter long. When Erika got married, the sisters got together and made up a bunch of those Make-A-Mixes (we love making those together because you can get more bang for your buck! We’ve done them a couple of times over the years). This is one of the mixes we found. It’s great because I store the jar in my pantry and whenever I feel like just a cup of hot spiced orange drink, I whip it up!

Hot Spiced Orange Drink Recipe:

1 10 oz jar Tang orange crystals

2oz Lemonade Mix

2 C Sugar

2 tsp Ground Cinnamon

1 tsp Ground Cloves

Mix and store in a covered container.

Jar instructions:

To make into a drink, mix 2-3 tsp of Hot Spiced Orange Drink powder mix and 1 C boiling water.

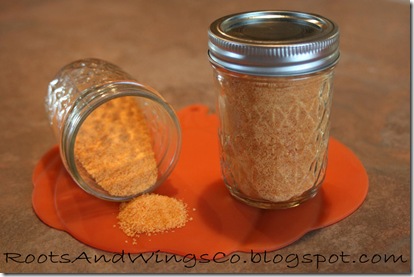
hot spiced orange drink mixx

Make a jar of the powder mix. Then, make yourself a cup. Then, put your feet up, relax, and enjoy. Hot drinks are always so soothing to me.

Rebecca

Thursday, October 22, 2009

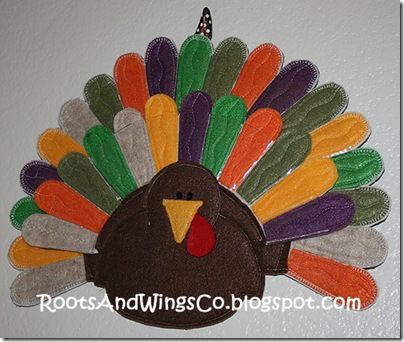
Thankful Turkey Keepsake

Every year I try to come up with an activity to do with my boys that will reinforce being thankful.

Thankful Turkey Keepsake

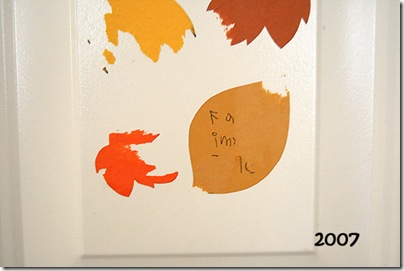
In 2007, I cut out leaf shapes from colored paper and used my trusty Xyron machine to stick them to the back of my entry way door. Each day my son wrote something he was thankful for. I had great plans to put the leaves in a scrapbook to forever remember the sweet things he wrote. Unfortunately, they got really stuck to my door. It was a disaster. (I won’t say who, but someone I know, just may have left them on her door for …oh say a year like this because it was soooo hard to get them off…) BTW, this one said Family Time…before I tried to rip it off the door;)

thankful 2007

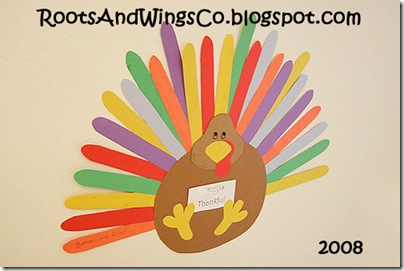
Last year, I made these cute turkeys for my boys. They wrote what they were thankful for on a feather each day. It was nice but took a while to make two. They had their names on them and said “*name* is Thankful”. My boys really enjoyed this.

thankful 2008

This year I wanted to make something we could use every day…and then year after year! I know! Brilliant.

My friend Melanie over at Sugardoodle…wait, have I told you that I grew up with Melanie? I did. I know her and love her. Anyway, she has this Thanksgiving Countdown she posted from Valerie Lee. There is a download that is full of a whole month of thankful activities to do with your kids, like “I am thankful for Grandparents. Call and tell them I love you, I am grateful for you. “ Sweet!! Some of the days don’t work for us because of food, but the rest are just awesome. I’m going to print them out and put one in each pocket on my little keepsake. My boys will take turns revealing their note. Next year my little one will be a little older. He should be able to write his thankful things down himself. We will probably go back to writing our own things we are thankful for next year.

Alright, let’s make one!

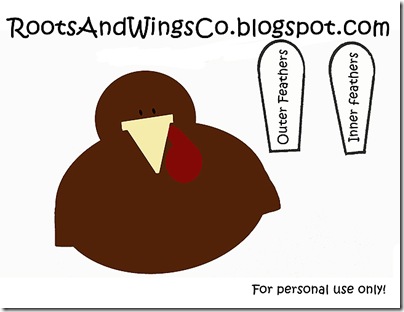
Turkey

Right click on the above image and save as for the pattern.

I am going to assume you have a little sewing knowledge, otherwise this would be waaaay too long of a post;)

You need

  • Fall colored felt for the feathers, beak and waddle.
  • Brown felt for the turkey and coverage too.
  • Peltex Pellon to make your hanging sturdy.
  • clear vinyl for the pockets
  • Ribbon or trim to hang it
  • the rest of your typical sewing needs;)

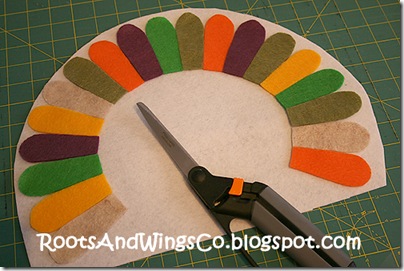
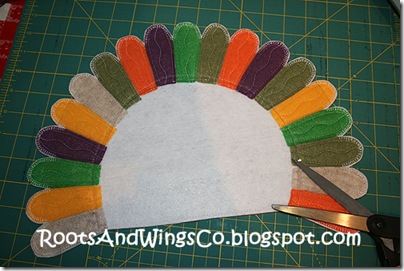
I cut out 18 of the outer feathers and arranged them onto some Peltex Pellon. It is quite stiff and will hold the shape nicely.

1

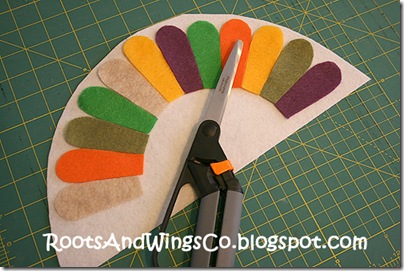
Do the same with 12 of the skinnier feathers. Lay them out on some Peltex too.

2

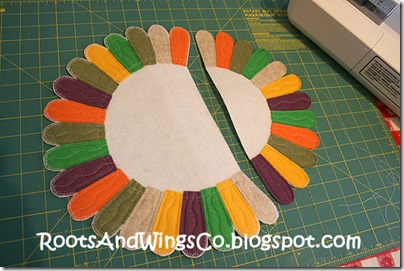
Sew them down to the Peltex and trim around the tops of the feathers. Here both rows of feathers are done.

3

It is hard to see, but I cut out some vinyl to the shape of the feathers (like a rainbow) to make the pockets.

4

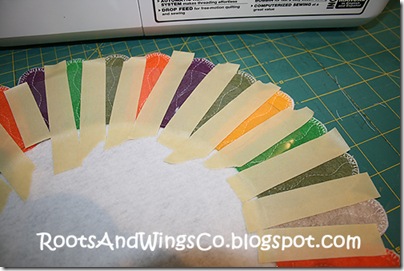
This stuff is tricky to sew on. I placed a piece of tape over where I wanted each seam to be. Each feather is going to be the guide for my pockets. I stitched between each feather to hold the vinyl down. I used a short stitch length to make sure that the tape would come off easily.

5

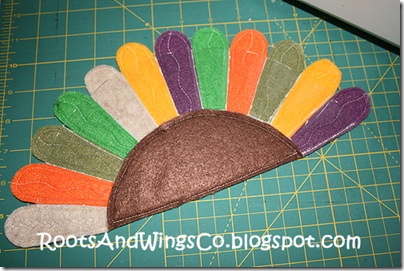
I cut some brown felt to cover the white Peltex that was showing on both rows of feathers.

6

Then I just stitched the layers together. I layered the top row of feathers on top of the bottom row of feathers and stitched around the arch. I then stitched the top curve of the already assembled turkey to the stack of feathers. I was careful not to sew any of the pockets closed. I hand stitched a little ribbon to the top so I could hang it.

7

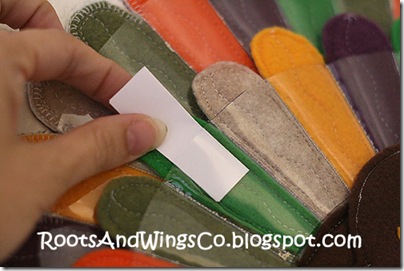
Can you see how the vinyl made little pockets? I am slipping one of the countdown notes into each pocket. Double check to see if my math is correct…there should be 30 pockets/feathers, one for each day in November.

8

Enjoy! If you make one, I would really like to see it.

I am thankful for my family. Every day of my life, I am amazed at the two amazing little boys that are mine! I don’t know how or why they are mine, but I am so thankful that they are! I am thankful for my husband who works very hard to provide for us, and who adores us with every part of his being. I am thankful for my extended family too. What a bunch of crazies we are!

What are you thankful for? Do you have an activity that you do to reinforce what you are thankful for during November?

**ETA Peltex is a Pellon product. It is basically a thick stabilizer. You can sew it in or get one that is fusable on one or both sides. You purchase it where all the stabilizers are.

The vinyl I used is the thickest I could get. They sell it to use for stuff like table covers etc.

Anjeanette

Tuesday, October 20, 2009

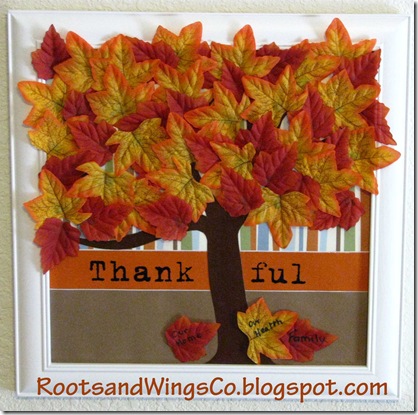
Katrina’s Thankful Tree

There are lots of ideas out there on Thankful Trees. This is my take on it. There are two criteria for my family for activities like this that have a life lesson. One is that it has to be quick because my boys just won’t sit for something that is long and drawn out. Two, it has to be something that is easy to fit into our daily routine and not take a lot of time or energy to do. We have a hard enough time getting our Autistic son to sit down to do homework or anything that he perceives as “work.” I think (time will tell) that I have come up with something that will work for us.

Thankful tree full of leaves

What I used to make my thankful tree:

12x12 inch scrapbook paper for the background.

12x12 inch dark brown scrapbook paper for the tree

Poster board

Rub on letters

Silk leaves I purchased from the 99 cent only store

Mod Podge

Loctite Fun Tak Mounting Putty (to hold the leaves in place)

Sharpie pen to write on the leaves

12x12 picture frame that normally holds a collage of pictures my son took. (The collage and glass are behind my thankful tree)

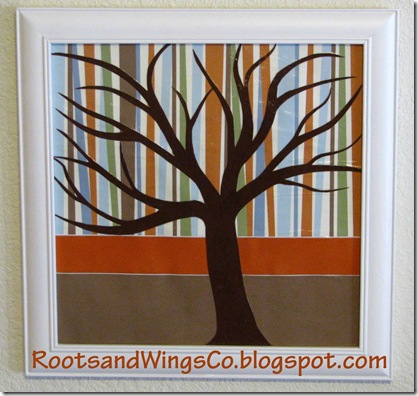
Bare Thankful Tree

I used a white colored pencil to sketch my tree on the back of the brown paper. When I was happy with my sketch, I cut it out.

I used mod Podge to glue the background paper to the poster board to help keep the paper from curling.

I then used Mod Podge to glue the tree onto the background paper. I used criss cross brush strokes so that it has a “painted” look when it’s dry. Kind of like when you look at an oil painting on canvas.

After the Mod Podge dried I placed my rub on letters on to the background paper. I used more Mod Podge to make sure the letters are protected.

I used mounting putty (the kind you use for posters that won’t mark the wall) to stick the leaves on my tree.

How we will use it:

Each day in November we will each take a leaf off the top of the tree and write what we are thankful for using only 1 or 2 words. We will then stick the leaves on the ground under the tree. By removing the leaves off the tree we are experiencing the passage of fall. By the time December 1st comes around all our leaves will have “fallen” off our tree and filled the “ground” with all that we are thankful for. Winter will be here. Since this hangs on the wall near our dinner table we will do this when we sit down for dinner.

We can reuse the background next year and simply add new silk leaves or cut some out of paper.

One idea of what to do with the leaves we use this year could be to scrapbook them on a two page layout with 4 smaller trees, one for each person in the family. Each tree would be labeled with our names and our Thankful leaves will go onto our trees. This way we can look back years from now and see what we were thankful for.

Katrina

I am thankful to my Sisters-in-law for inviting me to join them in making this blog. It has been so much fun. I am also thankful to all our friends who stop by every day to check out the things we have made and leave us a little note.

Friday, October 16, 2009

Gifts for Neighbors/ Girlfriends/Teachers/ General

I got so many compliments on this gift.  Everybody we gave them to had to tell me how much they liked it and which recipe they used.  On recipient went so far as to mail my son a gift as a thank you.  This is like a gift in a jar but with options.  Because I gave them the recipe for the mix as well as recipes for what to do with the mix it is a gift that keeps on giving.  Then there is the reusable snack bag it is packaged in plus laminated recipe cards backed with some nice sayings.  Go  HERE to see the full post.


Erika shared a brilliant way to up the Wow factor of gifting glass bake ware.  Never loose your bake ware at a pot luck again.  Learn how she etched the last name of the recipient on this glass bake ware.  Oh the possibilities are endless with what you can etch.  Etch some custom stem where with a monogram or symbol.  Make a candy dish like Rebecca did HERE.  Go see Erika’s how-to post HERE.


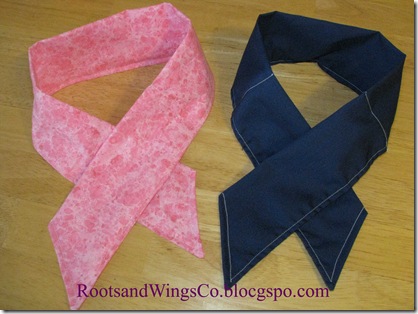
If you live where it is hot and dry, then you know someone that could use a neck cooler.  These are filled with water jelly crystals that plump up when you soak them in water.  The cool moist crystals act much like an evaporative cooler to make the wearer feel cool and comfortable.  You can see the tutorial HERE. 
 

[IMG_6288.JPG]

Pillowcases for any occasion!  With all the fun fabrics available seasonally you, your child, your parents, a special Grandmother,  a Neighbor, a Teacher, a friend, a friends child could have a fantastic pillowcase to decorate their bed with.  I have to tell you that even boys will get excited for a fun new pillowcase.  They aren’t all that hard to make and don’t have to use a ton of fabric.  Rebecca and Anjeanette came together to give you a whole post about making pillowcases.  At the start of the School year I showed how to make a MINI TRAVEL PILLOW SHAM.  You really should check out Anjeanette and Rebecca’s PILLOW CASE TUTORIAL.

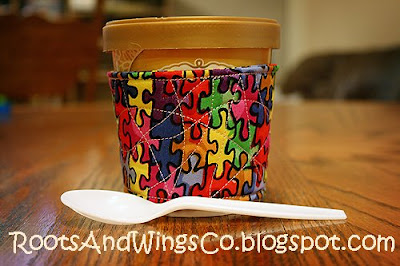
I scream, you scream, we all scream for ice cream……cozies. ;)  Make an ice cream cozy to go along with a gift card for some ice cream.  This is the perfect thing for a get well gift, a thank you, I’m sorry, your BFF when she is having a bad week, Christmas, Birthday, Mother’s day or any other occasion you can think of.  Just think about all those lovely fabrics that you don’t need a ton of to make a very personalized gift.  Seriously ladies you could make these using your scrap fabrics.  Even if you don’t have a single piece big enough, you could sew strips together to make a patchwork piece.  What a great way to recycle fabric scraps and add to your gift stash at the same time!  See how Anjeanette made THIS ICE CREAM COZY.


We will see you all when we come back on Tuesday. Thanks for understanding our need for a little time out. We hope we have given you some gift ideas to think about for the upcoming holiday season. We are so excited to have so many new friends!

Thursday, October 15, 2009

Email Subscriptions Now Available

Towards the top of our sidebar on the right we now have Feed Burner. Just enter in your email address and submit. It is easy and you can receive updates on all our posts via email. Never miss another post again.

Gifts For Children

Anjeanette shows how easily you can make these personalized canvas’ using a picture. Given as a gift or just to add some additional style to their room. Any child would love being made into a star on their very own art work. I can see this working great for girls too. Think rock star. You know the girl with the microphone and a guitar? Like maybe Hanna Montana? Or how about making it a High School Musical theme? Ballerina, super hero, astronaut……I could go on but I don’t have to because you are already thinking of your own theme for a special child in your life. Go HERE for the tutorial.

[21 finished bag[11].jpg]

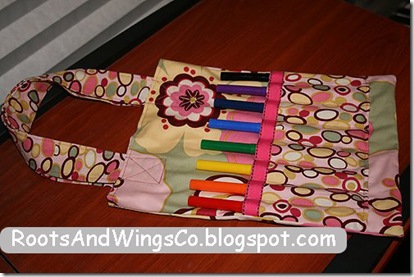
Yep, Anjeanette did it again with this art tote. Ok so these fabrics are girly but the possibilities are only limited by the fabric selection at your local store. This bag is great not only for toting around art supplies when on the go. It will also hold favorite toys, snacks, clothes, library books and so much more. Stock up on markers and note books when back to school supplies go on clearance and make up a few of these bags. You are good to go for any child’s present. Is the artist a little more sophisticated and past using markers? How about colored pencils or sketching pencils and a pocket for an eraser? Go HERE for a fabulous tutorial.

[IMG_8122.JPG]

Going to a Renaissance festival? Don’t want to buy an over priced headband? Does some one you know want to be a princess or a renaissance girl for Halloween? Just want to know how you get ribbon to curl like that? Then we have the tutorial for you! Go to see Rebecca’s tutorial.

Are you looking for a specific design on a shirt for a child? Can’t find it? How about making your own freezer paper stencil? It can be quite addicting to use freezer paper as a stencil. Just ask Anjeanette. She got the whole family involved. Check out this POST to find out how they did these fun t-shirts.

Technorati Tags: ,

Wednesday, October 14, 2009

Marshmallow Goodies

[8+Peeps+in+a+Jar.jpg]

You have your graham cracker crusts, chocolate M&M’s and marshmallows all baked in a pan for some OOOOOOOOO SOOOOOOOO GOOOOOD treat. The great thing is that you can find Peeps in Halloween, Christmas and Valentines shapes. You can also find fun marshmallow shapes in the baking isle for all the big holidays. Buying M&M’s from the bulk bins at a candy shop often means that you can put together your own color combination. You can choose to pack these as a seasonal treat or use the recipients favorite colors. Give it as a gift or bring it over when your BFF needs a little pick-me-up. Click HERE to go to the tutorial.

[IMG_6311.JPG]

Did you know that marshmallows are actually really easy to make? Oh the possibilities are endless when you make your own marshmallows. With Christmas coming up you can grind up some candy canes or use your favorite extract to change the flavor to your liking. Anjeanette, made hers and dipped them in chocolate. Rebecca ground up Red Hots to coat hers with. I used a powdered frosting mix that was basically powdered sugar with powdered vanilla extract added in. OH MY GOODNESS!! If you like marshmallows, even a little bit, you will LOVE your own home made version. I promise. There is NOTHING like fresh home made marshmallows. Ok now it is time to stop reading about it and click HERE to get the recipe and tutorial. Your family, hips and friends will thanks us for it. ;)

Now that you have made your homemade marshmallows you can package some up in a nice mug with some gourmet hot chocolate to give as gifts. If you have a pot luck coming up why not make up a huge batch of hot cocoa with a platter of home made marshmallows on the side. Make up a batch for when your family goes out caroling and needs warming up when they are done. Or maybe the kids are at Grandma’s for the day……………………….. You get the idea. Go HERE for some more ideas.

Tuesday, October 13, 2009

Gifts for Dads and Grandpa’s

[8+add+details+like+name+and+trace+hands+spray+with+sealant+and+voila+you+are+done.jpg]

I love this idea. Anjeanette made this with her boys for her husband. It could easily be made for a Grandpa or Great Grandpa as well. I can see doing this on a stepping stone.

Paint your child’s hand and wrist and then press it down on canvas. This could be done with fabrics to make an appliqué for a quilt block. Better yet make a quilt and add to it every year as your children and family grow. Go HERE to see Anjeanette’s tutorial.

See what I mean about putting your child’s hand on fabric? Do I need to say more? Simply wonderful…….. Go HERE for the tutorial.

[IMG_2025.jpg]

Who does not love Shrinky Dinks?! We teamed up to give you 3 ways to make gifts for some special Dads using Shrinky Dinks. Go HERE to see what we came up with. We would love to hear your ideas too.

Monday, October 12, 2009

Make Your Own Vanilla Extract

finished bottles

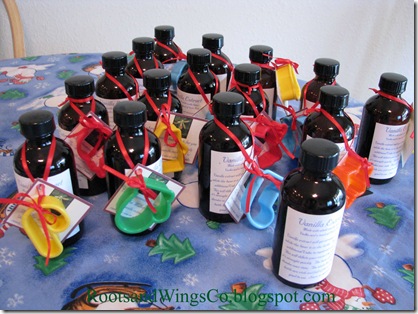
Now is the perfect time to start a batch of your own vanilla extract. It takes 8 weeks to be ready to use. If you get going now your vanilla will be ready in time to use for Christmas. Even if you don’t get your vanilla started on time, you can make a little tag letting the receiver know when their extract will be ready for use. Each of these 4oz jars contains 1 vanilla bean each. As long as the vanilla bean is in the bottle, it can be topped off with additional Vodka. Talk about the gift that keeps on giving! Go HERE for the tutorial.

Technorati Tags: ,,,

Sunday, October 11, 2009

The Roots and Wings Co girls are in a time-out

Always life is our center stage. Sometimes we have to put our blog on hold while we gather up our lives.

For fun, I decided to get a kidney infection and lose 5 pounds in one week! I mean, I dearly missed my old friend 134(pounds people, I’m a curvy girl). I would have liked to have seen him in another way, but my kidney decided otherwise. My son is getting a scope for his EE tomorrow. We will be at the hospital for most of the day.

Rebecca just moved into a new home. She thought it would be fun to have her personal checking account hacked into all while trying to secure a new mailbox, get her utilities turned on and everything that would be super helpful to be able to access the money in her account. (Luckily she just had her account frozen from someone in CA, she did not have any money taken out.)

Katrina’s sweet dog decided to get old and need lots of care almost overnight. She also thought it would be fun to throw in some therapies for her children into the mix.

Erika, well our sweet Erika has a new baby. She also has some major food allergies that are not helping her feel well right now.

Life, right?

We have put ourselves in time out until our dishes get done, or kidneys feel better, our mailbox gets rekeyed, our dog gets some more love and our little man gets some healthy Mom snuggles.

Don’t worry! We have some of our favorite gift giving ideas for you. But first a few things:

I wanted to share with you two of my favorite crafty blogs. Have you met Lollychops yet? She is so very funny. Seriously, this girl is a hoot. AND she makes amazing things. Someday when we win the lottery, we are going to have a getaway somewhere cooler and just spend the time crafting up a storm with Lollychops. Go right now and subscribe to her feed. You won’t be sorry. You may also want to carve some time out to view her whole blog. Really, go now…I mean after you have read the rest of this post, and left a comment…then go.

My other favorite crafty blog is Creative Kismet. Maybe it is because she is fairly local. I just love how artistic she is. It makes me want to create more just for me.

My questions to you are:

#1 What is happening in your life right now? Do you need to take a time-out yourself?

#2 Can you share with us a favorite craft blog besides your own? While I love to search all kinds of crafty round up blogs, I’m wondering about a blog where the person(s) makes amazing and beautiful and creative and artistic things. Maybe a blog that everyone doesn’t have on their sidebar. Someone that fills your creative soul.

Stick with us this week as we share some really great gift ideas that you can start right now to stock up your holiday gift closet.

FYI..if you leave a comment and your email is active when you signed in, we try to respond to you personally. I'm just saying some of you leave great comments and no way for us to respond.

Anjeanette

ETA We should only be out for about a week. Don't worry though, Katrina graciously spent Saturday scheduling posts for the week.

How to make your Jack-O-Lanterns last

[IMG_2153.jpg]

This is my son’s Jack-O-Lantern from last year. We carved our pumpkins a day before Halloween last year. I tried a trick I had heard about to keep the pumpkin from shriveling up. I took this picture on November 7th. That is right our Jack-O-Lanterns lasted from October 30th till November 7th!

What did we do? I smeared white petroleum jelly all over the cut edges. I didn’t coat the entire inside just the cuts we made. At the point that I took this picture our pumpkin had white fluffy mold growing on the inside so you wouldn’t want to cut it a full week before Halloween but this method will certainly make this less of a last minute event.

Happy Halloween!

Katrina

Anjeanette here. I know this may be no big deal to those of you in much cooler areas. But here in Arizona, our Jack-o-lanterns have very short life times (a day or two is all). I'm totally doing this with our Jack o lanterns this year. Thanks Katrina!