Friday, January 29, 2010

Handprint Valentine Hearts

valentine heart handprint 2
I know that you have seen these before. 
valentine heart handprint 1
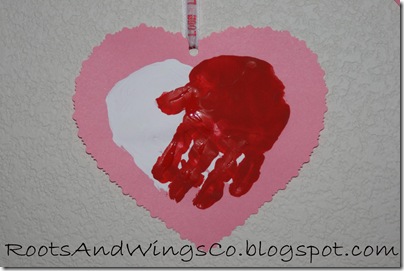
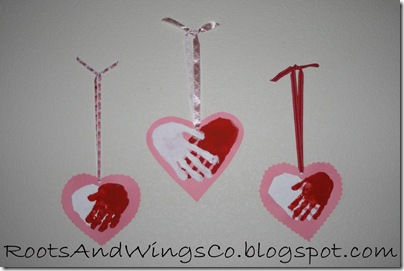
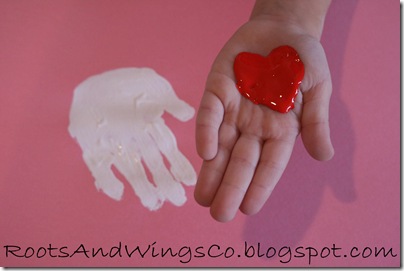
Super sweet hearts, made from handprints.
Don’t you LOVE the sweet girly nails?
valentine heart handprint 3
I made these with all 3 of my kids.
valentine heart handprint 4
This picture is so sweet to me, with their different sizes of hands!  Who doesn’t melt when they see these kinds of things?
  valentine heart handprint 5
But did you realize that done in the red and white…
valentine heart handprint 6
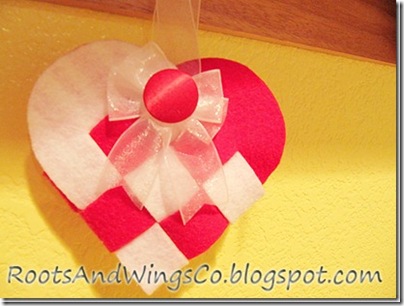
These are also faux Woven Danish Heart Baskets?
danish woven heart basket
See how you get the same red/white pattern?

valentine heart handprint 7
I love simple things that are so beautiful!
  valentine heart handprint 8
This tiny hand was the hardest to hold still! valentine heart handprint 9
But the oldest one, reminds me the most of the Woven Danish Baskets. valentine heart handprint 10
I was not going to put Valentine’s Decorations up until February 1st.  I like to surprise the kids with decorations all of a sudden being up one day.
But I had to hang these as soon as we made them.  And they will stay up for the whole month of February.
Don’t forget to put their names, ages, and the year on them.  I put those things on after I took the pictures for this blog! ;)
Rebecca

I'm linking to Trendy Treehouse, Twice Remembered, and DIY Day.

Tuesday, January 26, 2010

Valentine’s Activity

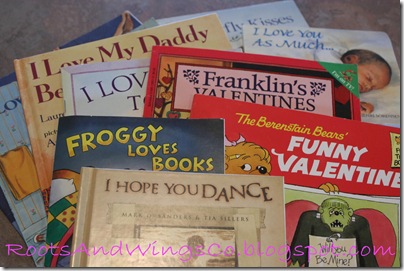
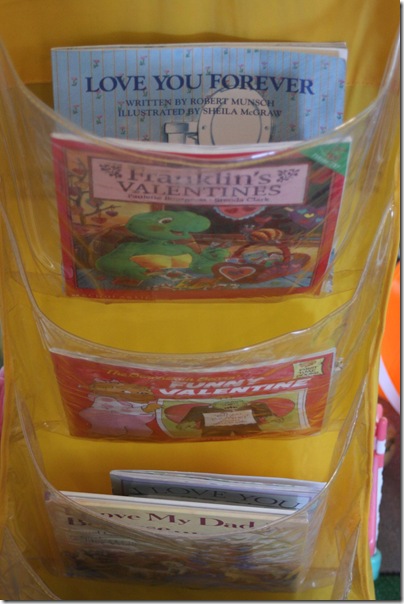
valentine books 2

I come from a line of AVID readers! Actually, that’s quite an understatement. We all have wall to wall, floor to ceiling bookcases in our homes. In fact, I think we all dream of having vaulted ceilings with those bookcases with a rolling ladder to get to them all! We love books.

An important tradition that I do for Valentine’s is to have Valentine books out. I use these books to read from for our bedtime story, reading a different one each night. I love putting thoughts of Valentine’s Day into my kids heads, from morning until night. In our family books are often given for gifts. If you do this, make sure to sign who the book is to and from, and a short comment is nice as well. We love seeing our personal messages in our books. I love knowing that not only is “Love You Forever” a super sweet book (that I’ve read a million times and still cry every time) but that I received this from my Grandmother (another avid reader)! I did not go out and buy all of these books at once, they accumulate over the years. I try to buy a themed book for the kids for each holiday. These can cheaply be bought from book orders (look in the corner as there are usually $1 books there!), and after holiday clearance sales!

valentine books 1

I found one of those school pocket things, from a garage sale. This is where my kids will find their Valentines books, on February 1st. I actually do this tradition every month. It used to be just for the holidays, but now I like to have a theme for those months without a holiday. For January, this was filled with books about Winter time. It is amazing how much the kids will automatically pick from these books to read. I have bookcases in every room of my house (literally). Yet, the books in this book display are the ones the kids will most read from (except my oldest who has her own, much harder, books to read! ;) It is also a good way of rotating books. It always feels like Christmas when I go through and pull out all of my books within one theme (in this case, my Valentine’s books). I find it makes the books more fun, each time we put new ones out this way.

I saw a lot of people are starting to have a Christmas book a day. I hope you can see why it is a great idea to do for Valentine’s Day, as well. My kids love picking which Valentine’s Book we will be reading for bedtime, though I’m sure you could wrap these up the same way many people did their Christmas books. For us, picking out which particular story for tonight, is half the fun for us. We rotate who’s turn it is to pick the story.

Rebecca

Katrina here:

I love this idea and have been doing the same for years. I started doing it as a way to prepare my autistic child for an upcoming event like Valentines Day, Easter, 4th of July, Halloween, Thanksgiving and Christmas. I used them like social stories. This way he knew what to expect when the time came. Not only is it a fantastic way to spend some quality time with your children but books like these can give your child a deeper understanding of what the event really means.

And YES I have always dreamed of a traditional library. I picture deep rich colors, dark woods, leather chairs and floor to ceiling bookshelves with rolling ladders. Oh and a fireplace because curling up with a good book infront of a fire just sounds like heaven. ;)

Friday, January 22, 2010

Heart Box Tutorial With A Secret Cheat

heart shaped box 4
If you were with us last year, you know that I do a Valentine’s Day Countdown with my children. I have Valentine’s Surprises every day for my children, starting on February 1st. This year I am trying to have everything ready to go by the end of January (wish me luck on that one!). These Heart shaped boxes are just one of the surprises I have planned.heart shaped box 5
I tried a bunch of variations of 3D hearts, to use for decoration. When I figured these out, I realized they would also be great as a container for some of the treats that I have.
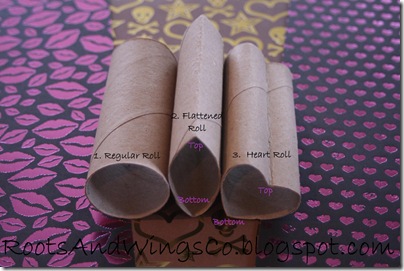
heart shape boxes 3
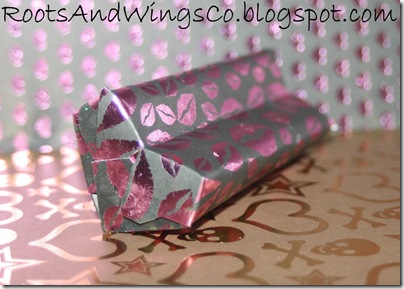
Ok so now you see the secret cheat that I used. Toilet Paper tubes! Some people are grossed out by this…I’m not. They are perfect for helping the paper to hold it’s heart shape and make the boxes more durable! I figured out the easiest way to turn that regular roll of toilet paper into a heart shape. I thought I was brilliant and told my Mom about it. She had that figured out before I told her. See, this is why we are the way we are (my Sisters and I). We get it from this brilliant woman!
So the easy way to transform your toilet paper roll is to take the regular roll (1) and flatten it (2). Make sure to crease the folds well. Then, take the top fold and bend it the opposite direction to make the crease in the top of your heart (3). That’s it! Easy peasy, right?!heart shape boxes 4
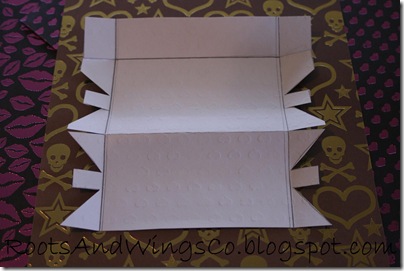
Then, I played around with the scrapbook paper I wanted to cover the boxes with. I made myself this handy dandy template. I needed it to go around the heart, but already have creases in the paper, because the paper I used was pretty stiff and would not easily conform to the heart shaped toilet paper roll. Notice that one crease will fold in along with the crease of the heart, and the other fold will go out(meaning fold it the opposite direction from the first fold) to go around the bottom tip of your heart. The side flaps/notches are what will make the top and bottom of your heart and keep in your goodies! I found you needed a lot of notches because of the heart shape. This is what worked best for me.
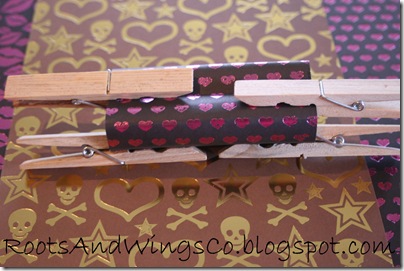
heart shape boxes 6
I then painted a nice layer of modge podge onto the backside of my paper (but only the center section that will be glued directly to the toilet paper roll) and wrapped the paper around the heart shaped toilet paper. The paper will not stay put on its own and it is quite helpful to use those large clothespins, to hold everything in place while the modge podge is drying. heart shape boxes 8
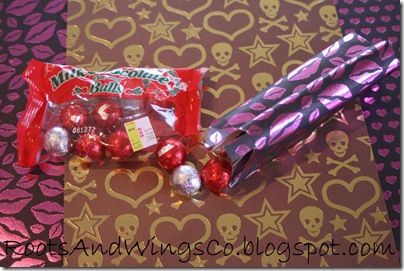
Seal up one side of your heart shaped box. Fill your container with goodies that you scored in the after-Christmas clearance sales! Oh yeah! These ended up costing me 10 cents each for the bags of red and silver foil covered chocolates. Yes, the outside packaging was Christmas, but the inside packaging was perfect for Valentine's candy. Then, seal your last side of your box. I tried using modge podge and then I tried double sided tape to seal the ends up. Both seemed to work well.
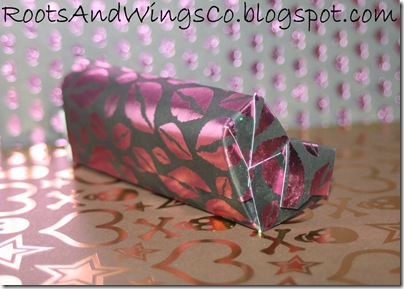
heart shaped box 6
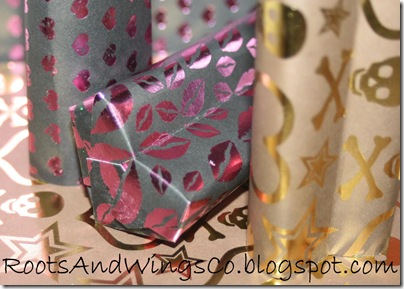
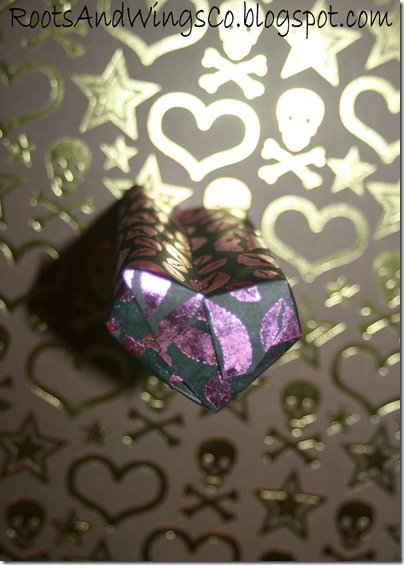
I can not wait to have these waiting for my children in their Valentine Mailbox! Though, this year I am changing the mailbox idea up a bit. You'll have to keep coming back to see how that will change. Do you see that awesome skull and heart paper? That will be put into use for my Son! He’s starting to think some things are a little too girly, so I hope this fits the bill for him!heart shaped box 8
These would also be great to make with your kids, for their friends for Valentine's Day. I think I will be making them with my kids! I could also see making them during other times of the year, maybe as party favors. Who wouldn't love a heart shaped box?
I can’t wait to show you more of my Valentine’s Countdown surprises, so keep checking back!
Rebecca


I linked up to Today's Creative Blog, and My Frugal Family, and DIY Day.
Monday, January 18, 2010

Valentines Day 2009 Recap #2

_MG_5947

Thanks for all your comments on the first Valentines Day Recap! Ladies, you made our day! ;)

Are you ready for round two? We have some fun ideas for all. Sew…..lets get to it!

[11+++5+finished+pillowcases.jpg]

Valentines Pillowcases! I love this idea. Anjeanette, my boys could use a couple of these. ;) LOL She has a great tutorial to show you just how she made these lovely pillowcases. Rebecca includes pictures of pillowcases from past years. They really do give you tons of ideas for these. Not into having themed full sized pillow cases? How about making one for a mini travel pillow? Check out my tutorial for how to make a quick and easy travel pillow case. I have made Halloween and Christmas mini pillow cases so far and am looking in the remnants bin to see what I can come up with for Valentines day. My boys like to use the mini pillows for their teddy bears. They get so excited when I do little things like this for them.

Valentines themed food. Send them with a little love note in their lunch box. Check out the post to see what other everyday foods Rebecca shows her love with. Here is a hint, she likes to use color to add to the theme. It brings to mind Dr. Seuss and his Yink that like to wink and drink pink ink. Or maybe Green Eggs and Ham but that is for a different holiday. ;)

Valentines Tic Tac Toe Isn’t this sew cute!? It takes a little time and you can use a machine or sew by hand. However, it is also something that you can keep and use over and over. Why not make the tic tac toe board with white felt instead of pink. Then you can make shapes that go with other holidays as well and keep using it all year long? She has even added a pocket to the back to keep all the pieces in! Anjeanette is sew clever! ;)

[_MG_5999.JPG]

Valentines Advent Mail box. Make Valentines day 14 times the fun with a mail box advent. Rebecca shows you how she dressed up this cute tin mailbox. Who doesn't like to get mail?! Why not make up some of Anjeanette felt envelopes (from the last recap) and use them in the mail box? The great thing about this is that you can customize the advent activities or goodies to your family. The possibilities are endless. Start with February first and put something in the mail box each day till the 14th. You can put little “What I love about you” notes inside or candy, handmade prizes (pillow cases, tic tac toes game, lollypops, items for a craft) or even a clue for a scavenger hunt. You are only limited by your imagination. Love it!

_MG_5947

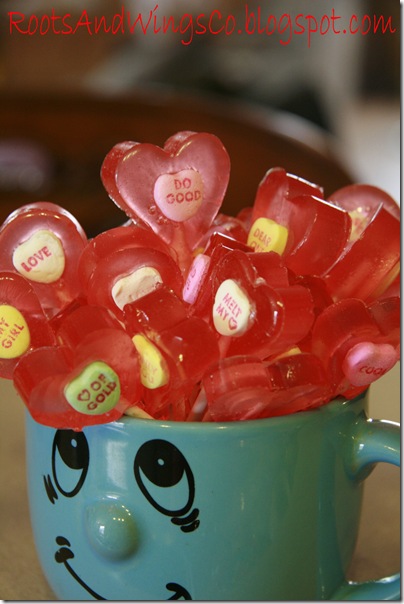
Nana's Valentines Day suckers. Nana (aka my Mother-in-law) is famous for making treats for every holiday that comes around. It is no wonder that her girls are all crafty. I love the idea of making my own suckers. Some day I will have to get molds of my own. If you don’t have hard candy molds and don’t have the time that these require, why not try another of Nana’s ideas? Make your own template and make chocolate heart suckers. You can use red or pink chocolate or even regular chocolate and pipe them into heart shapes and add the conversation hearts in the middle. If you don’t like conversation hearts you can use Valentines sprinkles. Love your ideas Nana!

[IMG_6333resized.jpg]

Make your own Marshmallows! Have you ever made your own marshmallows? NO!!!! Then you really should try them. They aren’t that hard to make. Kind of fun actually. Ok, cutting them with cookie cutters is a little tricky but fun! The ladies made these last year and came up with two ways of adding a little something extra to coat them with. Back then I was a follower (one of the first I might add;). I decided to give them a try. I am not a big marshmallow fan but WOW homemade is SOOOOOOO MUCH BETTER! I was out of powdered sugar when I made these so I used a powdered frosting mix I had on hand. It consisted of powdered sugar and powdered vanilla flavoring. THEY WERE OH SOOOO YUMMY!. I would suggest coating your cookie cutter with non-stick spray if you want to make shapes. The cutters still get a bit gummy when coated in powdered sugar after you cut a few shapes. Do cut a few into shapes just for fun and make the rest little squares.

Now that you have made those marshmallows here is a yummy idea for a special Valentines treat using those Marshmallows.

Anjeanette reviews 3 ways to make felt fortune cookies. Ideas for these are all over the place. Last year Anjeanette decided to try a few out and give you her take on them. This really is a fun idea. I can see putting “what I love about you” notes in these and opening them at the end of dinner every night from February 1st till the 14th. Or use them when birthday’s come around. All the family members can write something special about the birthday person and put it inside. Then after dinner or dessert they can open their special notes. Maybe this can be done at breakfast. Then the birthday person can start their day feeling loved. The best part of all is that they are 0 calories, 100% allergen free and you don’t have to buy take out to get them! ;)

We are so glad you dropped by!

Katrina


We're linking up to Make Your Monday and a Silly Little Sparrow and Blue Cricket Design, and SomeWhat Simple.

Friday, January 15, 2010

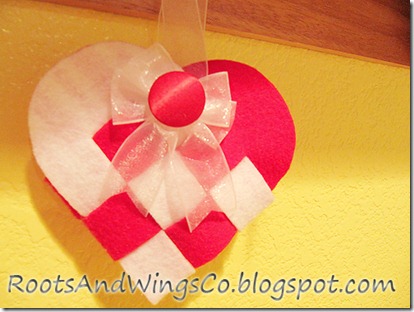
Adorable Danish woven hearts

Yes! They are fabric. What can I say, I think in fabric. I figure if I am going to spend my time making something, I want to be able to use it over and over. When you make these with just paper, they don’t last as long.

No, you don’t have to sew. Why anyone wouldn’t know how to sew, is beyond me. I can’t even begin to imagine someone not needing to know how to sew. And the idea that everyone doesn’t dream in fabric, again, is something I just can’t understand. Life is so much better in fabric. You almost expected me to say “Sew” instead of ”so”, didn’t you?

And just tell me that it isn’t adorable, I dare you... Ok, don’t. I was just kidding. Tell me that you love them and are going out right now to gather the supplies to make your own. Tell me how much you adore me. Tell me I am thin and beautiful. Maybe I’m letting the fact that my family has been sick all week get the better of this post.

Here is a peak-see of the inside of them. I know, cute! Once you have woven the two halves together, they are like little hanging baskets.

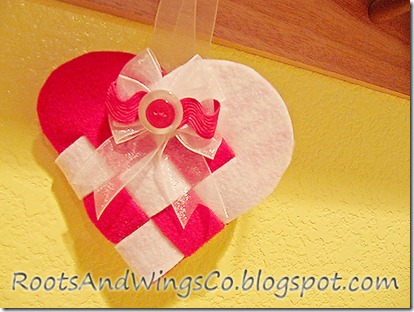
I found a pattern online and printed it out. You need your fabric and some iron on adhesive. Really this is self explanatory. Stick your two fabrics together with the fusible webbing. (Iron them with the webbing between them following the instructions.) Again I used red and white lined fabric for the inside of the hearts and red and white felt for the outside.

I thought it was much easier to weave the two halves together because they were made of fabric. When I make them out of paper, I either have to make them really big, or I cut the fold and weave them, then tape them together. Yah, I’m good like that.

I hung them with some ribbon because I thought it let the role of the hearts shine and ‘cause I have a boatload of ribbon laying around. Really, why does a Mom of two boys have so much ribbon laying around?

Decorate them differently for each child. I had some extra red buttons laying around making friends with all the ribbon I have laying around.

The best part of these hearts is that you could use them for so many things. To quote a favorite line from Holiday Inn…”Why they're great on... on... [pause] ... or even plain!”

Enjoy this super simple and adorable project.

Anjeanette


Linking up to Its So Very Cheri party and A Soft Place To Land's DIY Day and even a Silly Little Sparrow . We also linked up to Blue Cricket Design, and Fireflies and Jellybeans.

Tuesday, January 12, 2010

Valentines Day 2009 Crafts Recap

Hello everybody! It is time to get ready and start thinking about Valentines Day. But first… Did you know that Roots and Wings Co posted our very first post on January 9th of 2009? If you have been with us since the beginning you will know that back then we had a different name for our blog. It was “Favorite Things From Our Family to Yours” or something very close to that. Back then it was just Anjeanette and Rebecca busting out crafts every day of the week. In fact they did 14 days of Valentines crafts. Ok it started out as just 14 days of Valentines Day crafts but they had so many ideas for their new blog that they threw in a whole bunch of bonus crafts as well. Today I am just going to high light a few. You can keep watching for my next Valentines day 2009 Recap or check out all our Valentines Day crafts HERE

[IMG_7251.JPG]


MAKE VALENTINES DAY SPECIAL FOR THE WHOLE FAMILY. Rebecca gives you a peak into how she makes the day special for her family. Some of those crafts she had been making through out the whole “14 days of Valentines crafts “ were used to set the scene here. Talk about WOW! Can you believe she does this sort of thing for every holiday? She and the kids make paper placemats every month. Each one ties in with a theme or lesson she is teaching for the month.


[IMG_7234.JPG]


TEACHER GIFT BAGS. Don’t forget to show the love to teachers. It does not have to be something huge and expensive. Here Rebecca shows us how to dress up some homemade heart suckers (those are for another recap) for a special treat for teachers. So cute!


[IMG_7198.JPG]


VALENTINES DAY TEACHING TOOLS. As long as they are getting all the sweet treats, why not use them to teach pre-schooler’s their colors, sorting, and counting and graphing. When they are done they get a sweet reward at the end of the lesson. For older kids why not use them as visual aides for the math problems. 1 pink candy heart + 3 purple candy hearts = 4 candy hearts and YUM! There all all kinds of things you could use these for. How about fine motor skills for toddlers like stacking. How high can they make a tower of hearts? Put a rubber band around the end of some chop sticks to hold them together. Little hands can use them to pick up the candy hearts from a bowl and place them into another bowl. Again this develops fine motor control that will be needed for writing later on.


[IMG_7215.JPG]


HANGING PAPER HEARTS. I know you have scrapbook paper just waiting for a purpose. If you are a crafter I am pretty sure you have scrapbooked. If you have scrapbooked I know you have purchased one of those GIGANTIC pads of scrapbook paper. I can tell you I have and since I have boys I have no clue how to use up all those pink papers. Last year Rebecca made these and I KNEW what I wanted to do with all my pink papers. If you have the paper already, I know you have brads. Paper, brads, ribbon and a cutter that is it! Make just a few or make a ton for a garland. Check out our FLICKR GROUP to see how I used these in my archway. Of course back then I was just a follower. Looking back over the year you probably have noticed that Rebecca is big time into paper crafts and Fimo clay. You can bet that her craft room is filled with paper and clay crafting tools.


THIS IS NO ORDINARY FOAM HEART GARLAND. Rebecca wasn’t the only one busting out with the Valentines crafts. Anjeanette did just as many. You have heard her say it before (all the time), Anjeanette dreams and thinks about sewing projects most of the time when she is crafting. She sews just about everything. I would be surprised if she didn’t use her sewing machine back when she was really into scrapbooking. ;) She is also a big fan of doing her own cut outs. She finds the shape she wants and starts cutting away. She is her own die cutting machine.


[IMG_7123.JPG]


EMBROIDERY MACHINE HEART PENCIL TOPPERS Rebecca put her embroidery machine to good use for this craft. Don’t have an embroidery machine? No problem, she gives you some other ideas on how to make felt pencil toppers with out the fancy embroidery. However, you can still get this look by doing a blanket stitch all the way around. For the initials you can get iron on embroidered letters at the craft store or use pre cut foam or felt letters. There is also good old puffy paint. Rebecca put these at each of her kid’s place setting on Valentine’s day. In the top picture you will notice that they pencils she put them on were actually Valentine’s themed pencils. A great way to make the homework station a little more “special” during the month of February.


[10++sew+along+the+top+so+it+folds+nicely.jpg]


LOVE LETTER FELT ENVELOPES. I think is has been one of the most popular posts of the year. Anjeanette put together a tutorial for you on how to make this adorable felt envelope. I can think of so many uses for this little envelope. First it can be used to give some one a love letter and maybe a small treat. Then your child can use it all year long for pretend play. He or she can write “notes” and then play mail carrier and deliver the mail. This is the first of many posts Anjeanette did with felt. You have probably learned by now that she LOVES felt.


We have come a long way in a year. It has been fun going through our oldest posts to give you this recap. I know I said I was taking a step back this month and I am. I just couldn’t resist doing a recap or two of some of our favorite Valentine’s Day posts.


Happy Anniversary Girls!


Hugs!


Katrina


Linking to Somewhat Simple.

Friday, January 8, 2010

Polymer Clay Gifts

I made these gifts for Christmas but these are perfect for any time of the year. I think all of us have those friends who are hard to shop for and so making jewelry always seems the best way to go.
This pendant was surprisingly easy to make. Polymer clay is really great to use (you just need an exacto knife and a pasta roller). I have always wanted to use the blender method to make my own colors and it turned out wonderfully!

You can buy the black cording at a craft store (like Joann's) and it already came with the closures on it so I only had to attach the pendant to it using jump rings. Sooo easy!

The next gift I made is this snazzy bracelet. I made one also in blue, but wrapped it before I got a picture. The bracelet is a little more complex than the pendant, but also very manageable.
The only materials I needed were the black, yellow, and white polymer clay, stretchy cording and some random beads that were used as spacers. All in all, these gifts took about a day to make. Not too shabby!

Linking here and here and here!

Tuesday, January 5, 2010

Painting With Crayons-Bright Snowflakes

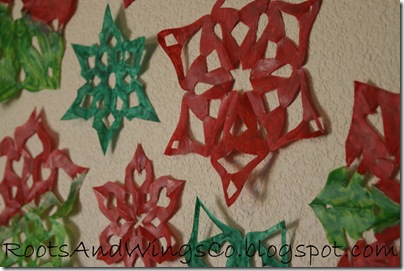
snowflakes 4

I have LOVED having my children home for the past two weeks and was quite sad they had to go back to school. However, we did quite a bit of fun stuff while they were home. This was one of the fun projects that we made.

snowflakes 2

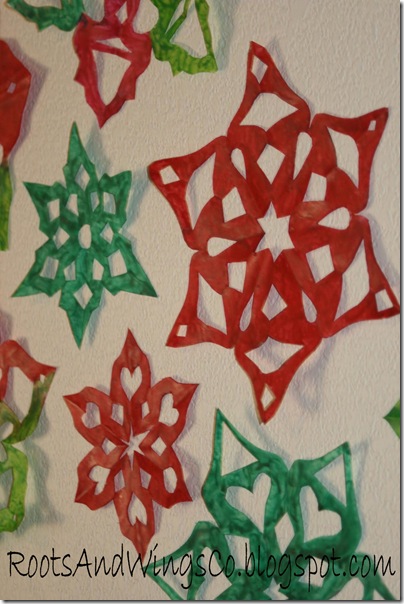
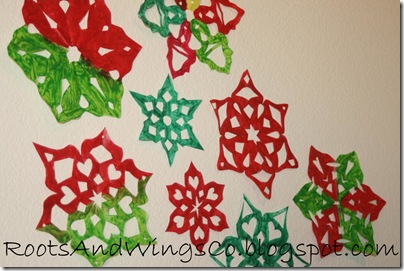
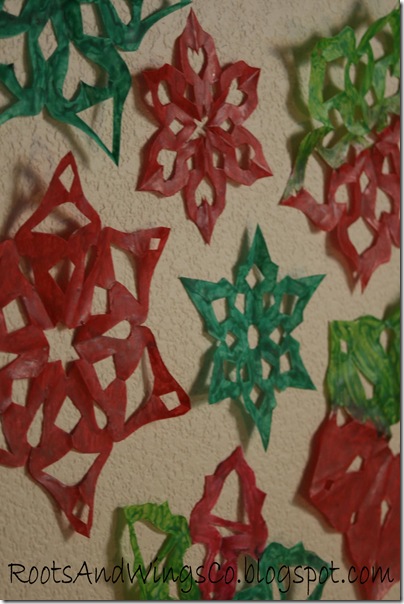
These snowflakes are just colored with crayons, believe it or not!

snowflakes 1

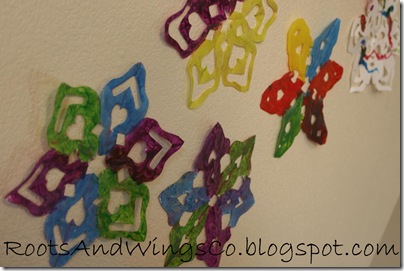
They are so bright and vibrant that I’m not sure when I will take them down. So lovely.

snowflakes 5

You need to cut out a ton of snowflakes. Trust me on this. You will run out long before you want to stop coloring these.

snowflakes 6

I made these with 6 kids ages 2-11 and everyone single one of them loved it. You could use this technique on any shape and even on regular paper as well. However, this week we are going to be focusing on a winter theme so I am just sticking with these snowflakes that we made.

painting with crayons on snowflakes 2

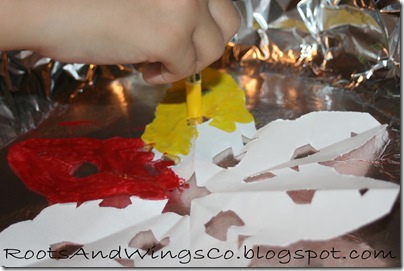
To make these you simply cover a frying pan with aluminum foil. Heat up the pan while you peel the crayons that you want to use.

I would suggest having the kids kneel/stand on a chair next to the stove. This is just for safety. Having the kids higher up is better as their hand doesn’t get close to the pan when it’s coming down from above. (Now that I’ve warned you, I must also remind you that I had 6 kids, ages 2-11 and not one of us got burned!).

painting with crayons on snowflakes 1

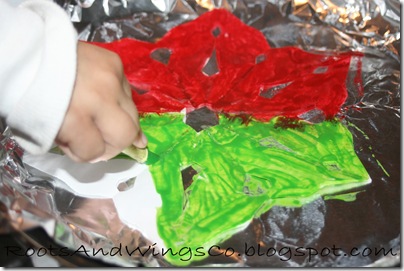
Put a snowflake onto the aluminum covered, hot, frying pan and color. The harder you press on the crayon, and the slower that you move it, the more the crayon melts. It melts immediately and so you are more painting with the crayon than you are drawing/coloring with it. So cool!

snowflakes 7

You can even mix colors and see what comes up. You can tell the difference in brands of crayons. Some of them melted into the paper and leached out. While others mostly stayed on top of the paper. It takes a minute for them to dry completely and go hard. You are left with a thick layer of crayon on top of the paper, which is why they are so vibrantly colored! It gives a nice stiffness to them, as well! Just an all around fun project with great results for every age!

snowflakes 9

Rebecca