


 Ok so the girls here at Roots & Wings Co thought it would be fun to have some Christmas in July. I hope you come back all week to check out what we have cooked up for you.
 My husband is a sweet man. He is very easy going and doesn't complain much. In 16 years he has told me once that he didn't like what I made for dinner. Once people. How nice is that? But he did get a little crazy on me one time and requested I not play Christmas music all year long. Can you believe that? Sick, sick man. This was very early on in our relationship. So being the ever so faithful wife I am, we came to a compromise. While I am around him (in his presence) I will refrain from the Christmas music until my birthday in August. I know! I am nice like that. But when it is just the kiddos and me alone, we rock out to Christmas music any time of the year;) It isn't a surprise that my children love Christmas music and will listen to it with me all year long. That's right...even if they don't look like me, they are like me after all. I'm so proud;)
When we decided to do a Christmas in July, I instantly knew what I wanted to do. I FREAK out about Advent Calendars. Growing up, we had one that our mom had made. It was made of felt or fabric. It was a Christmas tree with pockets below for ornaments. The ornaments were small items and I remember the last one was a nekkid baby that was Jesus. At least in my memories it was sans clothing. Maybe I'm wrong here. BUT I loved that Advent Calendar. Since I had my own kids I had been dreaming about making an Advent Calendar like the one we had when we were kids. A couple of years ago I finally put my idea into action. I fell in love. Since then I've had a sickness. The great Advent Calendar sickness. Last year I had 4 different calendars. It is a sickness people.
Since my son can't eat candy, we don't do anything with candy. So the calendars from me are non candy. Even before we knew he couldn't eat, we didn't want extra candy anyway.
So today I'm going to share with you a little tutorial for an Easy Pizza Pan Calendar. This is so easy that you now have no excuse not to have an advent calendar.

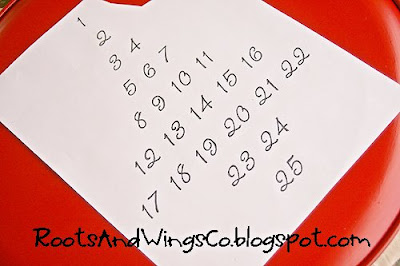
I know, cute huh?!
You need:
-pizza pan (I got mine from the dollar store)
-spray paint
-printer & paper
-paint pen
-Mod Podge
-coordinating ribbon (I wanted mine to puff up so I used 1" ribbon.)
-clear blocks or rocks (again from the dollar store)
-strong magnet
1. Spray paint your pizza pans. Ok don't spray paint IN your rocks if rocks are part of your yard on purpose. We just had new grass put in and I didn't want to mess it up. So I painted on the rocks. Then I had to go back and scatter them around the whole yard so my sweet husband remained in love with me;) I'm good like that. Do as I say, not as I do on this one people.

2. While you are waiting for the paint to dry, print out the numbers 1 through 25 shaped as a tree on some paper. It took me a while to find the right shape for this. When you are choosing your font, a more simple font is better because too fancy of a font is hard to read when it is all said and done.
3. You need to transfer your numbers onto your pizza pan. If you have carbon paper or transfer paper, sandwich it between your numbers and your pan and trace it out. If you are like me and go through transfer paper like it is going out of style, you can make do with a pencil. Turn over your numbered paper and scribble on the back side. Make sure you cover every part of each number. Put the paper right side up and trace over your numbers leaving the imprint of the numbers on the pan.
![]()
4. If you have a really steady hand you can paint the numbers right on. I would water down your paint to make it flow more smoothly. But if you are like me and want nicer lines, use your paint pen and trace the numbers.

5. I wanted a way to decorate the outside of the pan as well as hang the calendar. I used Rebecca's Crop-a-dile to punch holes around the pan. I wanted the holes to be uniform so on the back side of the pan I marked out where I wanted my holes to be. I also wanted a larger space filled with the ribbon. So I spaced the holes with two closer together then a space, then two closer together. You can make the holes how ever you would like. I also left a space at the top without holes because I wanted the ribbon to drape nicely.
**If you don't have a Crop-a-Dile, you could use an ice pick carefully. Or just do what I did and use your sister's Crop-a-Dile

6. Carefully thread the ribbon through the holes. Leave a length at each end and tie a pretty bow. This is how your calendar is going to hang. Remember that it is a pan you just cut through. It can be sharp, so be careful not to cut yourself. But also be careful that you don't snag your ribbon too much on the sharp edges.

Now you are ready to make the magnet. The magnet is to move from number to number as the days change. I know I always say this, but really Mod Podge, just change your name to Modge Podge already ok?

7. Cut the ribbon to the size of the bottom of the rock. With an old paint brush, brush the flat side of the rocks with Modge Podge. Apply the ribbon and then more Modge Podge. Make sure you cover all the edges of the ribbon so it doesn't come up.

8. With your trusty E-6000 glue (again if you are a real crafter you have this deadly stuff...if you are not a real crafter, go ahead and use whatever kind of silly glue you may have) glue a magnet onto the back of the dried ribbon on the rock.

It is such a simple project. We are in July, so you have no excuse not to whip a few of these puppies up for yourself and all of your family. There is no candy involved so you won't gain a single pound. You can thank me for that later;)
As always, if you make something using my little tutorial, please add a picture to our little flickr group.
Remember, this is part of a whole week of advent calendars. Be sure to check out #2 which is a framed button ornament advent, #3 which is a fabric candy or activity advent, #4 which is a fabric or paper chain advent, and#5 is an embellished felt ornament and fabric advent!
Anjeanette


9 comments:
That's great!!! I never would have thought of that!!!
I will definately be borrowing this idea! Thanks!
This is such an adorable idea!! I love it. Also, a great tutorial!!! Merry Christmas..err..Happy 4th of July. Which one do I say??? :)
Love this~ it is so cute!
So Cute! I've been wanting to make an advent calender for a while...I think this will be the one I try!
I have the same problem, I love advent calendars too. The past few years I have bought a new one every year. Combined with some from my childhood, I think I have 8/9 now. When I see a new style, I have to get it.
Susan
SUPER CUTE!! Love it!
My kiddos ask me to sing Christmas songs all year long. They love it! Drives my hubs batty.
I {heart} advent calendars! Thanks for so much inspirational fun and the great reminder to get things going... :)
Hi Ladies! I hope it's okay to add this to our post next week on Advent ideas. We love it! The top photo and direct link to your post is included in your reference. Let us know if it's not okay, Thanks!
Katie, Katie's Nesting Spot
What a fantastic project! I would love to link to this on AllFreeChristmasCrafts.com. If this is something you'd be interested in, please let me know! My e-mail is jlitz (at) primecp (dot) com. Thanks!
Post a Comment