Tuesday, March 31, 2009

Wow! We are in an Easter craft book from FaveCrafts.

So exciting! Our little bakset project is included in this fun Easter craft book.

This eBook publication is brought to you by FaveCrafts. With the wonderful contributions of some of our favorite craft bloggers, they have put together an Easter Craft eBook: Blogger Edition. Inside this eBook, you’ll find over 60 pages of Easter creativity with wonderful step-by-step photos.
Download the Easter Craft Book


Look at all the wonderful bloggers you will find in the book!
Megan of Boutique Nutmeg Designs
Mama King of 4 Crazy Kings
Heather of Small Fry & Co.
Amanda Cusick of Kitschy Coo
Anjeanette of Roots and Wings Co.
Heidi Borchers of Inspired At Home
Kira of Tangarang
Kerstin of duckyknits
June Scroggin of Junie Moon
Chica of Chica and Jo
Cindy Hopper of Skip to My Lou

How fun and exciting!! I can't believe we are even part of this group. So cool!


Anjeanette

Autism Awareness Pin


My oldest son is Autistic. He was diagnosed at the age of 2 1/2 years old. Over the years we have participated in fund raising walks. The first one we ever attended was in Phoenix. We drove 2 hours to attend. In years following we donated but didn't do the drive up to do the walk. Three years ago Tucson held their first Autism walk. Most cities have their own chapter of the Autism Society of America. They are a great resource. Not only do they have monthly meetings. They have an on line chat group where anyone can ask questions about anything pertaining to Autism. Ours even has a resource library where people can check out books that have helpful information in them. Last year we needed to have our son reevaluated by a Child Psychologist in order to continue receiving services from DDD. Our local chapter has a Child Psychologist that works in their building. The school psychologist is certified but not licensed so we needed a licensed psychologist for DDD. Unfortunately neither our insurance or DDD would pay for the evaluation. Our local chapter covered part of the cost of the evaluation. The walk that they host every year raises money that they use to fund grants (like the one they gave us) and to cover the cost of their facility. I didn't ask them to cover it and quite frankly I didn't feel comfortable filling out the form they gave me to be considered for the grant. I will say that we greatly appreciate what they did for us.

When we attend the walks, I notice that most people have come up with their own T-shirts, pins and signs that say something about why they are walking. I was thinking about making up some T-shirts but decided that they probably would only be worn for that event. I wanted something that was made up of puzzle pieces. Since that is the symbol widely used for Autism. Each child is a piece to the puzzle. They are all different. What works for one child does not always work for another. I wanted to tie it to my son in some way. I wanted to show that we love and support him. I came up with these pins. The "D" is the first initial of my son's name.
I made these pins by rolling out Fimo Clay to about 1/4" thick. I used two different puzzle pieces (from one of our puzzles) as templates. I cut around the puzzle pieces using a craft knife. The tricky part is pulling up the puzzle piece with out distorting the shape. I found that if I pulled up the rolled out clay before cutting out the shapes, it was a little easier. I used blue clay because that is his favorite color.

I smoothed out the edges and then put them in the toaster oven at the lowest setting for about 10 minutes. After they cooled down I used alphabet stickers and heart stickers to make my message. The pin in the center is for my son. It says "I'm Loved".

I then glued pins to the backs and let them dry. I used E-6000 glue. You can find it in craft stores. It is industrial strength. When using it you must work in a well ventilated area. This glue works on EVERYTHING. It takes a full 24 hours to fully dry. I let it dry for a few hours, till it was dry to the touch.

I pinned them onto a paper bag with handles. This way the pins won't get stuck to the paper when I spray them with clear coat. They stand up from the bag a bit. It also allows me to easily spray all the pins at once. I just held the bag with one hand and sprayed with the other. That way I didn't have any over spray on the ground or any other surface. Also the bag absorbed the over spray nicely. These were quick and easy to make. We can pin them to our shirts, hats, backpacks or what ever we want.

We are lucky. My son has responded well to early intervention. He has had amazing people working with him over they years. I have been given valuable information on interventions that have all been beneficial. Our families have been loving and supportive through all of this. I think that some times it is hard for families to understand Autism when they don't live with it. There are many families out there that don't support the branches of their families that have Autistic individuals like ours has. We also have great friends. Without our family and friends and all those amazing people helping and supporting us over the years, we wouldn't be doing as well as we are today. It truly takes a village to raise a child. We are lucky.

It hasn't been an easy road. If I could make just one wish, it would be for more awareness. Often times when I was out with my son, especially when he was little and non-verbal, I would get stared at when ever he had a melt down. I could feel that I was being judged. I could hear what people were saying. One person went even so far as to say "It is too bad we can't spank children anymore." My child wasn't bad, he was over whelmed by the sights, sounds and smells all around him. He was over stimulated. While I always tried to do my shopping quickly, it wasn't always possible to drop everything and leave the store. So the next time you see a child having a meltdown in the store, please consider that it isn't because they are spoiled and have bad parents. Consider that the child may be overwhelmed and unable to communicate it any other way. The fact of the matter is, we can't stop shopping when ever a melt down occurs. If my son was ever going to learn how to cope with stores, I needed to continue to take him out into the community. I needed to teach him how to control himself. Now we can go shopping with out the meltdowns. Some day when he needs to do his own shopping he will be able to do so and not get overwhelmed. I would wish for more compassion. I would wish that others be more accepting of those that are a little different than themselves. My son is more than a label. He is funny, loving, kind, creative and intelligent. He has feelings like everybody else. I have to say that I wouldn't change one thing about him. I wish that social situations weren't so hard for him but he is doing amazingly well and makes progress everyday.

1 in 150 children have Autism and 3/4 of them are boys. I had a 1 in 10 chance of having another Autistic child. Our youngest is, thankfully, not Autistic. Most children with Autism aren't diagnosed till the age of 3. One sign of Autism is lack of eye contact. Another sign is lack of using words to communicate. They may talk but use words only to state what they are seeing. They maybe be senitive to textures, sights, sounds and smells that can overwhelm them, including their clothing. They are very litteral and take words at face value and have trouble with words that have double meaning. These are just a few of the issues Autistic individuals face.

Katrina

We love someone with Autism. We also love Wubsy.


This is Rebecca, breaking into Katrina's post. I have a little something to post for this as well. Our family all tries to make it to walk the Autism walk together. Katrina made up these cute pins for all of us to wear. Then, she also had the idea of us all taking these pins home and turning them into magnets for our refrigerators. I did just as she suggested and love them.
The pins were nice because they are a nice large size. Each of us had one that pertained to us (Aunt, Uncle, Cousin, Mom, etc) as to our relationship to Katrina's Son. I loved that!

Here they are with the magnets already glued on the backs. I used a very strong glue, as well as really strong magnets. I hate having magnets that can't even hold through a piece of paper!
You can kind of see how these pins used to have a pinning mechanism that we removed in place of the magnet.

Here they are on one of my new magnet board in my craft room. But truthfully I keep them on my refrigerator where we can all see them more often. My kids all know what they say and why we have them!
Rebecca

Autism Awareness Felt Broach

April is Autism Awareness month. April 2 is World Autism Day. Katrina's oldest son has Autism. I thought this little pin would be a nice and simple way to show your support for the families that have been touched with Autism.

-Start with some scraps of primary colored felt.
-Trace a puzzle piece on each color. I used a black marker and just made sure to cut all the black off. Don't worry too much because you put the pieces with the side that had the marker facing down.

-Cut each shape out.


-Cut out two oval shapes in another scrap felt piece.


-Hand stitch one of the puzzle pieces onto one oval. I just did a simple running stitch with two strands of contrasting embroidery floss. I positioned the piece to the top and center of the oval. I also left some space around the edge of the oval for the blanket stitching that finishes it off.


-Stitch a second piece.


-Stitch your third puzzle piece on.


-Stitch on your fourth piece on top of the other three . I did the yellow on top because I thought it gave it the most POP.

-Stitch your pin onto the other oval piece.


-Layer the two oval pieces together.


-Sew a blanket stitch all the way around the ovals.


-Wear with pride.


~~

Anjeanette, I love it!! I think this is so great! I can totally see stitching this on to a baseball cap or visor too. I am going to have to put this in my idea box for next years walk!

Katrina

P.S Thanks always for all the support you and Rebecca have always given us.

Sunday, March 29, 2009

Smores in a Jar for Easter

If you are like me, nothing says Easter like some sugar, sugar and more sugar. Ok I realize that isn't what Easter is about. But I sure do enjoy me some sugar anyway. And if your sugar looks as cute as this, you would enjoy it too!


You start with your supplies: In this case Rebecca and I hunted a few stores for different options to make this fun. Did you know you can find graham crackers shaped like bunnies? AND if that wasn't enough, there are bunny shaped marshmallows from KRAFT. Hello! Why did I not know about this before? And of course, bunny Peeps and regular graham crackers were used in this too.

Let's start with the hanging tag. I cut a tag in the shape of an egg. The tag has the baking instructions typed up on it.
Punch a hole in the top of the egg. Fold over a length of ribbon and put both cut ends through the hole. Pull the ribbon through a little. Then draw the cut ends through the fold and pull.

Very easy and a cute detail.
Layer your ingredients in the jar. I find that the smaller ingredients end up at the bottom. If it is sugar or something like the crushed graham crackers, I like to put it in a baggie to go on top. I assembled this with the M&M's on bottom, then layered the bunny grahams, the bunny marshmallows and the bag of sugar on top. Add a little decorative trim to the lid and you are good to go.
If you are going the Peeps route, I added the crushed graham crackers and the sugar in a baggie to go on top.
I couldn't possibly just show you the gift in the jar. I wanted to make sure it would be something you would want to receive. I used to dislike gifts in a jar. But now, I LOVE them. They can be like having a boxed mix in your cupboard for those days when you need something quick. I love GIAJ!!
And for you, dear followers, I wanted to make sure to bring you only yummy treats. I did half a pan of each jar. I did crush the graham crackers on the left side and add it to the sugar. And I love me some vanilla, so I added just a hair more than the recipe called for. I contemplated just eating it as it was. But no, I pressed on for your benefit.

Ooh yummy goodness right from the oven. The Peeps did loose their faces. But look at their golden goodness. I can feel my thighs growing just from typing this up. Nothing but the best for my readers I tell you.
And the marshmallow side was even cute.
This was the only "slice" that made it nicely to a plate. This is a spoon and bowl kind of treat. The M&M's were all melty and gooey. The Peeps side did have more crunch because of the sugar coated Peeps. But both sides were good enough to eat...several portions. Well not me, of course. Ok...you pulled my thighs arm...it was me. It was also Rebecca and my Mom that ate several helpings. I mean the kids were playing nicely in the other room. There is no need to interrupt that is there?
Really, spoon, bowl, diaper wipes, yum. Don't eat the wipes. Use them to clean your face off before the kiddos come to see why you and your sister and Mom are being so quiet in the kitchen.


Ingredients:
1 1/2 cups (one sleeve) crushed graham crackers 1 1/2 cups marshmallows (I used bunny marshmallows or 8 Peeps)
1 1/2 cups Easter M&M's 1/3 cup brown sugar
Layer those items in a 1 quart jar. Put the crushed crackers and the sugar together in a baggie on top of the Peeps. The Peeps, marshmallows and bunny crackers I tried to face out so that you see their smiley faces. Much cuter than looking at their backsides.
*When you are doing GIAJ I have found that sugars and crumbs go in a baggie, then layer by size, smallest ingredient first.
Attach a tag with the following directions:
1. Empty the jar contents into a bowl.
2. Combine 1/2 cup melted butter and 1 tsp vanilla. Pour over the cracker crumbs and mix well.
3. Pat crumb mixture into a greased 9" square pan.
4. Layer the M&M's and then the marshmallows on top of that.
5. Bake at 350 degrees F for 15 minutes. Cool and cut into bars


Anjeanette

We are joining in on the following fun:
Craftaholics Anonymous,

Earth Hour Roots and Wings style

(I actually took this picture myself. I was having too much fun playing with my camera and the candle and the yellow light of the candle. I love how this one came out.)

I took my two boys over to my parent's house for Earth Hour. My two oldest nephews were there too. Rebecca's daughter had her tonsils and adenoids out this week and just wasn't up to driving anywhere. So they stayed in.

We turned off all the lights and everything in the house. My Dad read The Selfish Giant from Oscar Wilde. Dad's voice is deep and calm. There are some very tender parts in the story. Dad slows down until he can compose himself, then he carefully reads on. The 4 boys mostly played with their flashlights. Mom and I soaked up every second of Dad reading the story. I cried as I always do. It is a short story and yet so moving.

I am in love with my parent's candle stick. It has that adorable slot for your finger. I don't know why anyone would want a candle stick that is anything but this. Now I must find one for myself. I about squealed when I first saw it. It was so cozy with the lights off. Everyone is closer together. The yellow of the light makes me feel warm. Talking with my loved ones fills my soul.

Slowing down makes me want to do it more. We played with our shadows. Everyone tried their best to come up with something fun. Mom was making some kind of swan with both her hands. Dad made a dinosaur. I went with a dog;)

We went outside to find some constellations and match them up with our book. On the drive to my parent's house, my three year old was already commenting on the shape of the moon. He said it looked like it was sleeping on a bed because the illuminated part was a crescent on the bottom. It seems like the one constellation everyone knows is Orion. My six year old can always find Orion.

What a great way to spend an hour (actually three) with my family.


Along the same lines as Earth Hour a whole other bunch of people got together to be unplugged on Friday, the day before Earth Hour. See what they did.

Friday, March 27, 2009

Don't forget about Earth Hour tomorrow!!

Today my 1st grader took a constellation book to school. He explained to his class that we were turning off all our power, reading the constellation book, listening to another story from my dad and star gazing.
Hope you join us in your own way!

Baby Shower Fun

With Spring, comes new life in so many forms. My garden is growing spectacularly (I have lots of little seedlings poking their way up through the dirt in my gardens!). But a bigger thought in the Roots And Wings Co family right now is that of new babies. Our baby sister is having her first baby VERY soon! We are so excited for she and her husband and can't wait to meet her new little one! What better way to be excited for her than to show you guys what we did for the baby shower that we threw for her!
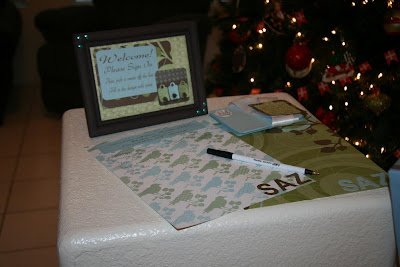
We started off with a sign in area. When you first walk into the house there is a half wall that is perfect for this. We had a cute framed sign with instructions. There were also instructions on the pack of cards that was there to write a tip of favorite baby items on. We made cute papers for everyone to sign in and write whatever they wanted. The pack of cards coordinated with the welcome sign and the sign in pages and had their baby's monogram on each one. They are not really "cutesie" parents and so we thought these colors worked so well and are beautiful. I have found myself at parties where you just didn't know what to do. Some times guests arrive when the hostess is busy, etc. So, I love the idea of having instructions everywhere. It helps keep the party moving and helps guests feel more comfortable.
On this same half wall in the entrance we were able to decorate and display other items. Here are the "goody bags". We found those adorable tiny bassinets on clearance at Walmart! Oh, yeah! We filled them with either blue hershey kisses, or nuts (for those nuts who don't like chocolate! Crazy people, like Anjeanette.). We wrapped those in tulle and tied them off with little cards that said "Thank You" on one side and had the baby's monogram on the other side. These were placed on a mini cupcake stand. I love mini cupcake stands and use them at every party we have! It's great to give height to your decorations.
Next to the bassinets were cu-ute clear boxes that had little blue feet running across them. We HAD to use these. Again they were found on clearance at WalMart! We filled these with green chocolates and mints.

Here is a shot from further back. However, the show stopper had to be what these goody bags were sitting on. Do you see that beautiful quilt? Ya! I want it too! That was Anjeanette's gift to our darling baby sister. Seriously, that girl can sew! She started making this first, and that's where we came up with the color scheme for everything else. How could we not coordinate everything to those gorgeous colors and fabric!? If you want a better shot of it, it's the first picture in this post! Gorgeous, hu!?
Anjeanette also made this lovely sign for the little one. So cute, hu!? It coordinated perfectly with the quilt.
Our sister's two friends thought it was at noon I think. It was at 3. Fun fun girls!


We were actually glad they came early. They are a hoot. How can you not love them?

Our family is always very big on food at these things!
We had chicken salad croissants:
These are a super easy and totally yummy idea for large get togethers. Buy those delish croissants from Costco. While you are at Costco, buy a large can of Mayo and can of chicken. You mix the mayo and chicken together and add in some chopped up celery and seasonings of your choice. Use this filling to stuff the croissants with. Super Dooper easy and Yum-O!

We also had some rolled cream cheese bites:
These are also super quick and easy. You take those refridgerated crescent dinner rolls, cream cheese (we prefer the herbed kinds), deli ham, and fresh spinach leaves. Roll out the dough and press together. Then, spread a layer of cream cheese, then a layer of ham and then spinach. Roll them up. Slice this roll into about 1/2 inch slices. Bake these for 12 minutes at 350. Again, Yum-O!

Another family favorite are the rolo pretzels:
Just take regular pretzels and lay them out on a cookie sheet. Top each one with a rolo. Add a walnut on top of this, although leave some without as not all people care for nuts (myself included in this bunch). Bake them until melted. Mmmm

We also had some magnificent Cheesecake squares that I don't have the recipe for (and don't remember who even brought them, but I'm thinking that Mom did!)

Fill in foods with store bought goodies like cream puffs, crackers, cheese, fruit and veggie trays and dips. We also had finger food munchies in baby bottles.
I always love doing a baby carriage bowl for the fruit. How cute and easy! You keep the handle attached by sticking toothpicks through it on the inside. Make sure to break off the toothpick so that it is flush with the cantaloupe. Otherwise, it's kind of pokey. I also have done this with watermellon, but due to the timing of the shower (Christmas time) there were no large ones to be found!Katrina was serving an amazing drink she made. It was like the hot caramel apple drink at Starbucks. You take apple juice and warm it up, then there is an apple/cinnamon flavoring from Starbucks that you put in it, you cover it in whipped cream and then drizzle carmel sauce on it. Hello!! So good.

I have an embroidery machine. So, one of my favorite things to do for a new baby is to embroider on a blanket for the baby. I gave our baby sister a blanket that says the baby's name in one corner. I kept this blanket because as soon as the baby is born I will then embroider the stats on each of the other corners. So, corner two would say the height and weight, corner three would say the date and time of birth, etc. I will embroider these up the day she has the baby and then mail them to her ASAP! I found this blanket as soon as I found out she was pregnant (and it just so happened to match the colors of the quilt Anjeanette made, how lucky is that?!). It is super soft and I just loved the colors of it!

The favorite part of the shower was the cute onesies that Anjeanette made! LOVE them! We've all seen people hang the onesies by clothespins. I had never done it before myself. I first painted all of the clothespins blue, because the little details totally matter! I was quite surprised by just how cute they all looked hanging on the line! I love things that can do double duty. These actually did triple duty. They were an awesome decoration, they were a fun "party game" and then they were a gift for our nephew to be!
Anjeanette had made up 24 onesies with 24 different designs freezer paper stenciled on them. We had them hanging "on a line". The designs themselves were so great! She cut them out by hand people! WOW!
We did not want cutesie designs. In fact one reason that we went this direction with these onesies is that we've seen baby showers where the guests use fabric paint to decorate onesies for the baby. Usually it kind of overwhelms some people, others do really cheesy decorations, and others are just not something the Mom actually will ever put her darling baby in. By having a stencil already to go, you eliminate all of these problems.
Painting these onesies really did end up being a fun activity for the guests. The guests got to choose which onesie they wanted to paint (they varied from newborn to 12 month in size). Then, we had a table set up with coordinating paints (again upping our odds that these onesies will really be worn). This gave the guests something to do which helped with the "small talk" problem. It got people chitchatting right away.

The designs were cut out from freezer paper and ironed them on ahead of time. All anyone had to do was pick which one they wanted to do and choose the paint they wanted. NICE! The above picture still looks a little messy because the freezer paper is still on the front. Below is a picture of many of the ladies painting up their onesies.

I think they turned out well. My favorite is hard to see. It is on the back row, second from the right. It is a shark swimming above a fish. The shark has a big grin on because he is going to eat the fish. Ok, maybe I was a little involved with the story to each onesie.

Anjeanette's all time favorite shower game is the diaper disaster game. You take a bunch of candy, melt it in the microwave and then smear each one into a seperate diaper. The outside of the diapers are numbered. Then you have to smell the diaper and try to tell what it was. My favorite picture for this game is to have someone smelling the number 2 diaper. I know. This is pretty funny too.

We did have other games as well. Mom bought essential small baby items and we arranged them on a tray. Then, you have the Mother-To-Be carry the tray around so that everyone gets a few seconds to look at the items. The guests have blank pieces of paper and pens so they think they are going to have to remember all the items. You have the Mother-To-Be "put the tray away" in the other room. Then, you tell the guests this is a memory game and they are to write down everything about the Mother-To-Be that they can. Extra points for extra descriptions such as, red dangly earings, etc. It's amazing how they generally wont have even looked at who is carrying the tray. This works well for a bridal shower as well! The great thing about this game is that then you give all the items from the tray to the Mother-To-Be.

Another game was a fill in the blank poem that is words of advice for the Parents-To-Be. Each blank is a candy bar. For extra fun for this one I wrapped blue ribbons around each of the candies. As I read the answers out I held up the candy that went along with it. Then, for the rest of the games (and we did this one first), we let the guests choose their gift from the basket of candy bars. Again, this fulfills my double duty need! =)

Yup, that's a smidgeon of the gang! They were all so helpful with this. It totally was a group effort. Isn't our Brother a hunk?! Back off ladies, he is taken...by our own Katrina. This is a pretty "calm" picture for us. As usual, I have to get goofy! Don't know what's up with that, just fulfilling my role as the...well, I don't know which role I fill for the family. But I make sure I have fun filling it! ;)

On the invitations we had asked guests to bring their favorite book, to add to the library for the new baby. I love doing this, and love the stories behind what books people chose, even more. Thankfully many of them even wrote inscriptions inside the front covers of the books. What treasures these books will be now! Our family is sooooo over the top in love with books! You have no clue. Some day we will have to show you our Dad's personal libraries!

I really love that most of the guests did this! One friend brought the book that her husband had written and illustrated himself! How cool is that?! So, it's a copy with an autograph and inscription from the author himself!

Whew! This was a lot of fun putting together. It seems as though we are always putting together a party of some sort. 90th BDay Parties, Sweet 16's, Bridal Showers, Baby Showers, etc. We really like to have lots of fun at our parties. We'll have to show a few more of the really neat ones we've done. You'll have to talk Anjeanette into posting her party from her oldest's BDay party last year. So cute!

Hope you all are enjoying spring as much as we are. This spring I am most excited for our newest family member to join the ranks of our family! I can't wait to get him in my arms and just inhale all of his newness. The one downside to a large and supportive family is that I'll have to wait my turn to get him....I think Papa will be the hardest to get him from! He's already so loved!

Rebecca